Tato Studio
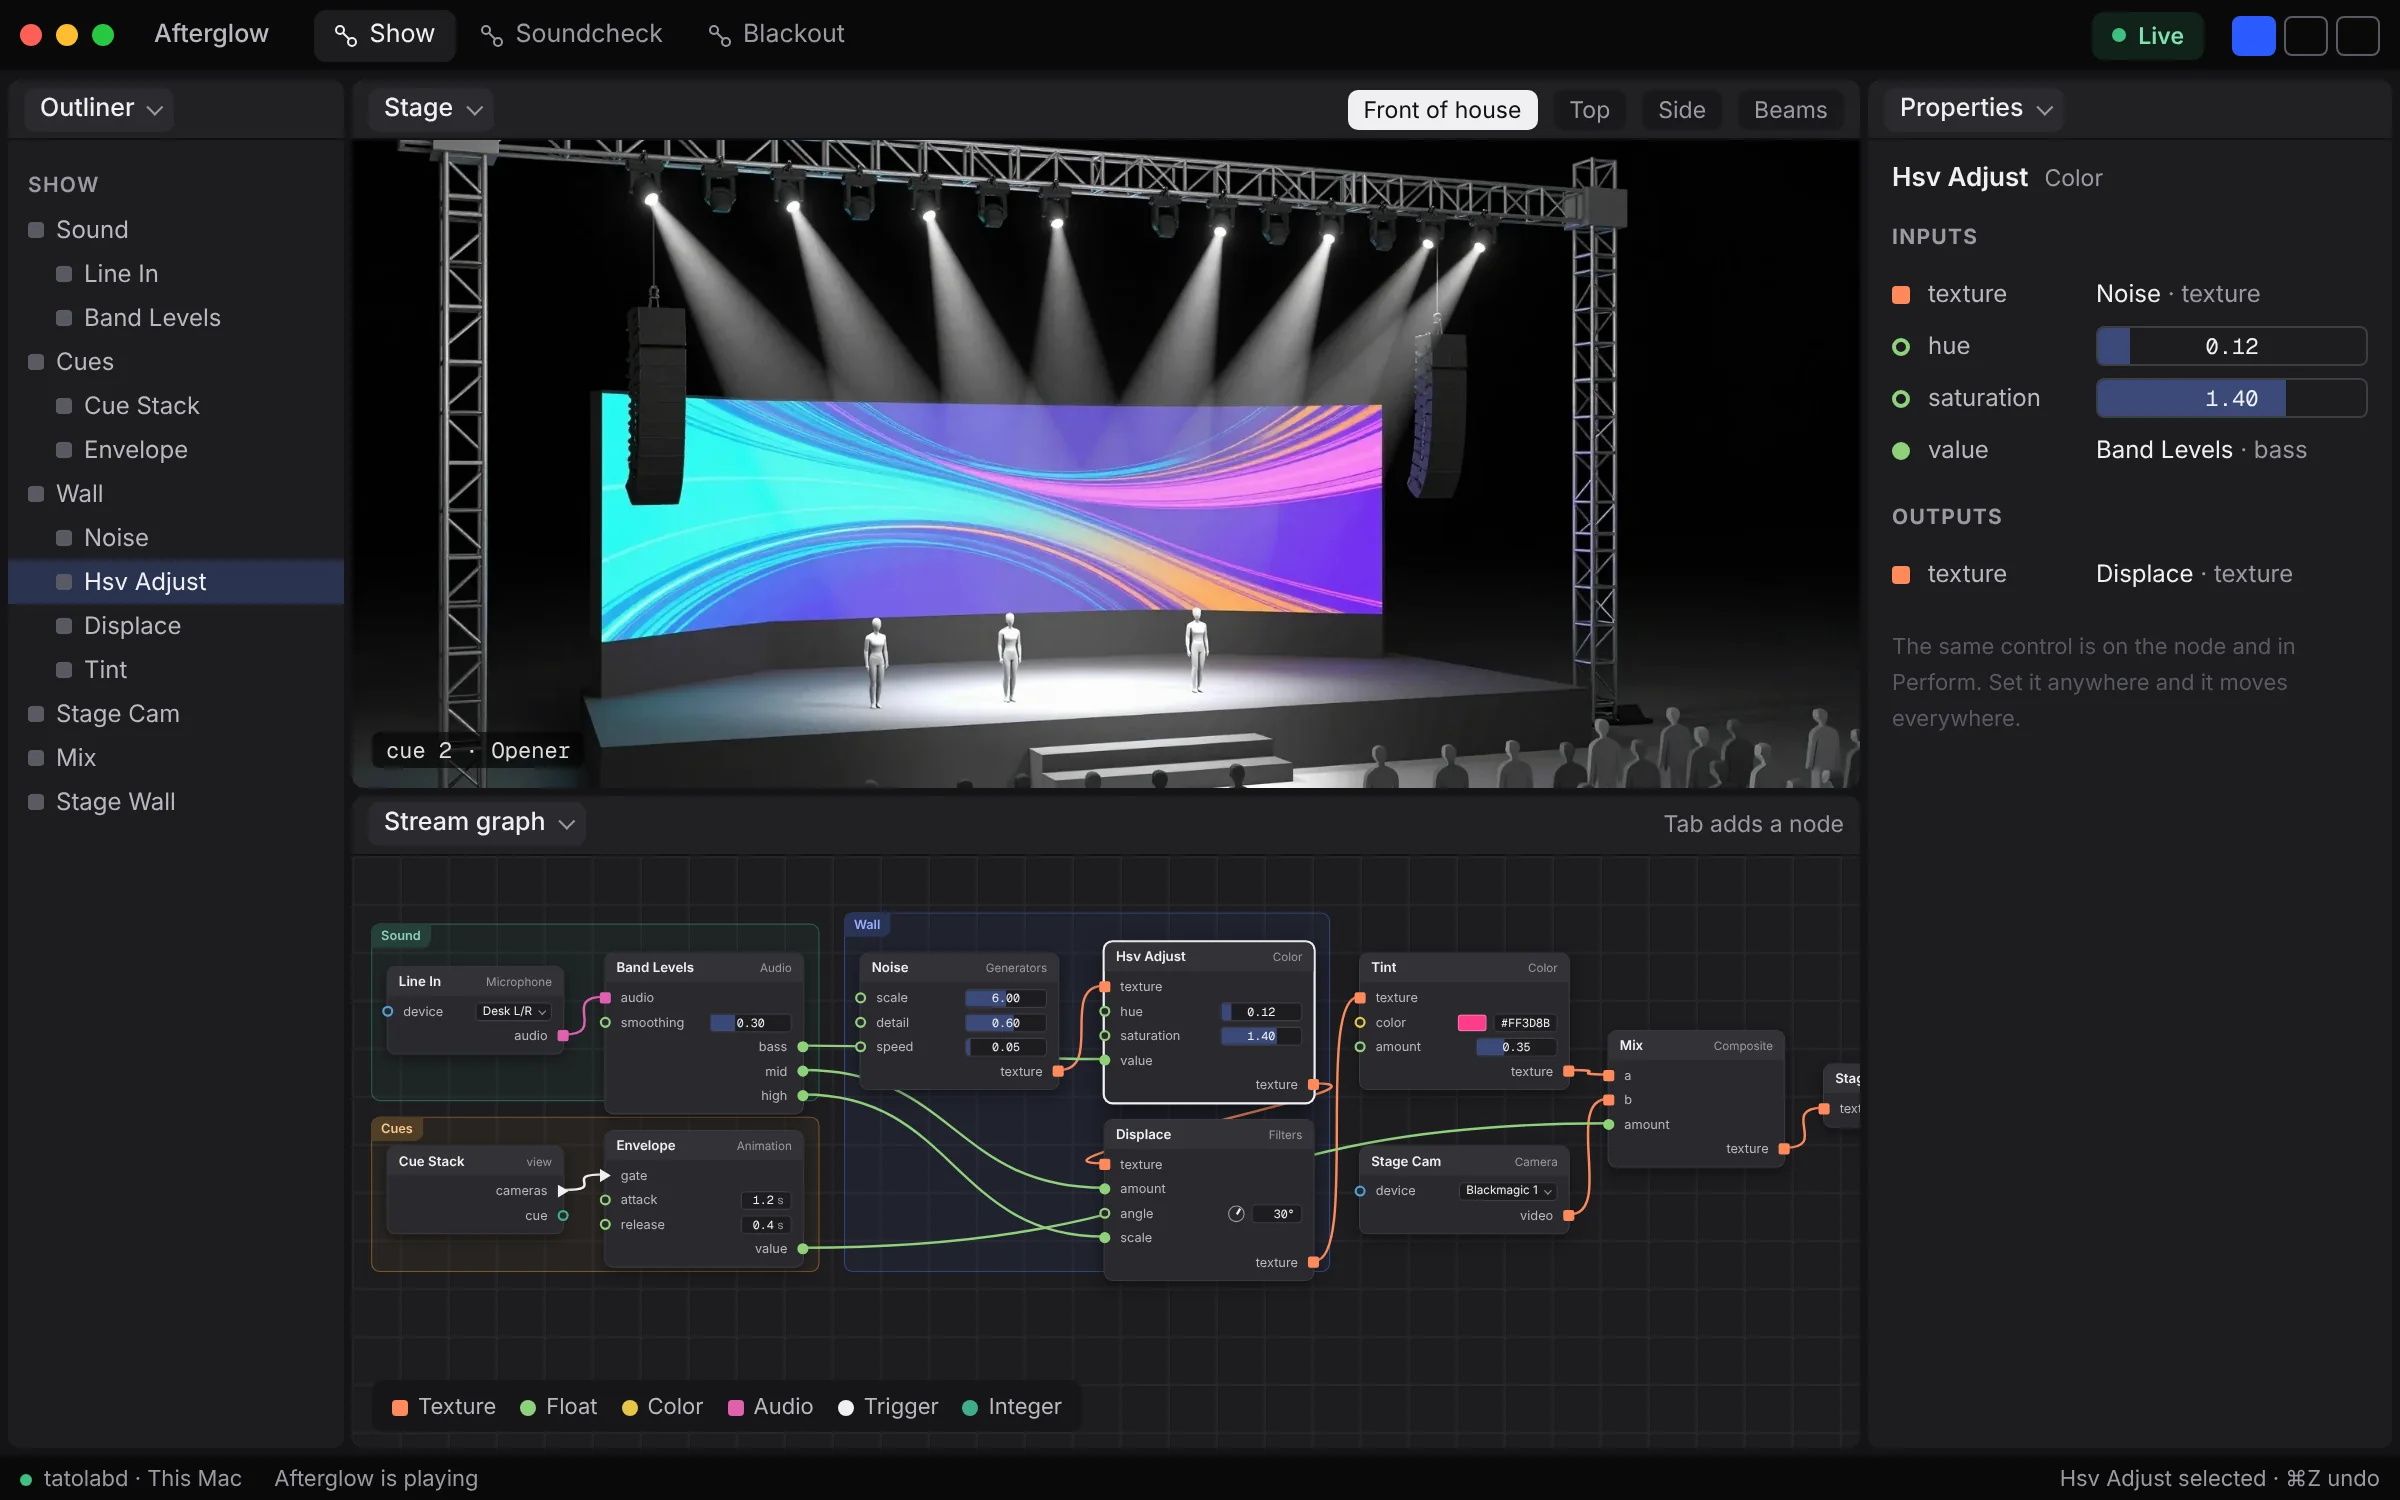
The desktop app where you build the thing and where you run it on the night. The picture stays on screen the whole time you work. It's on macOS and Linux.
Free and open source
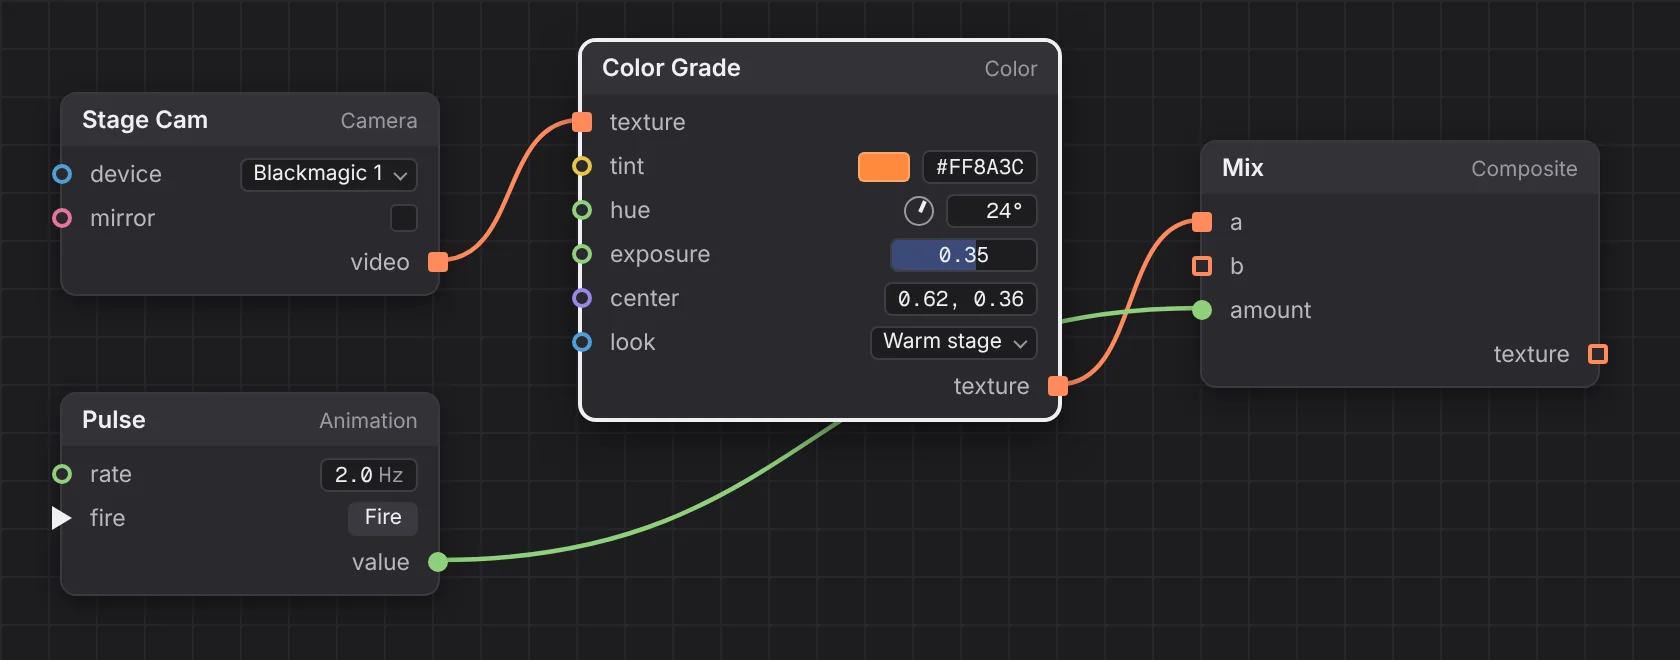
Press Tab. Type two letters.
That's how you add an effect. Drag a wire into empty space and the list narrows to the nodes that can take what's on the end of it.
Drop a node on a wire and it's inserted. ⇧⌘G folds a selection into a subgraph, U steps back out, and ⌘F finds a node by name.
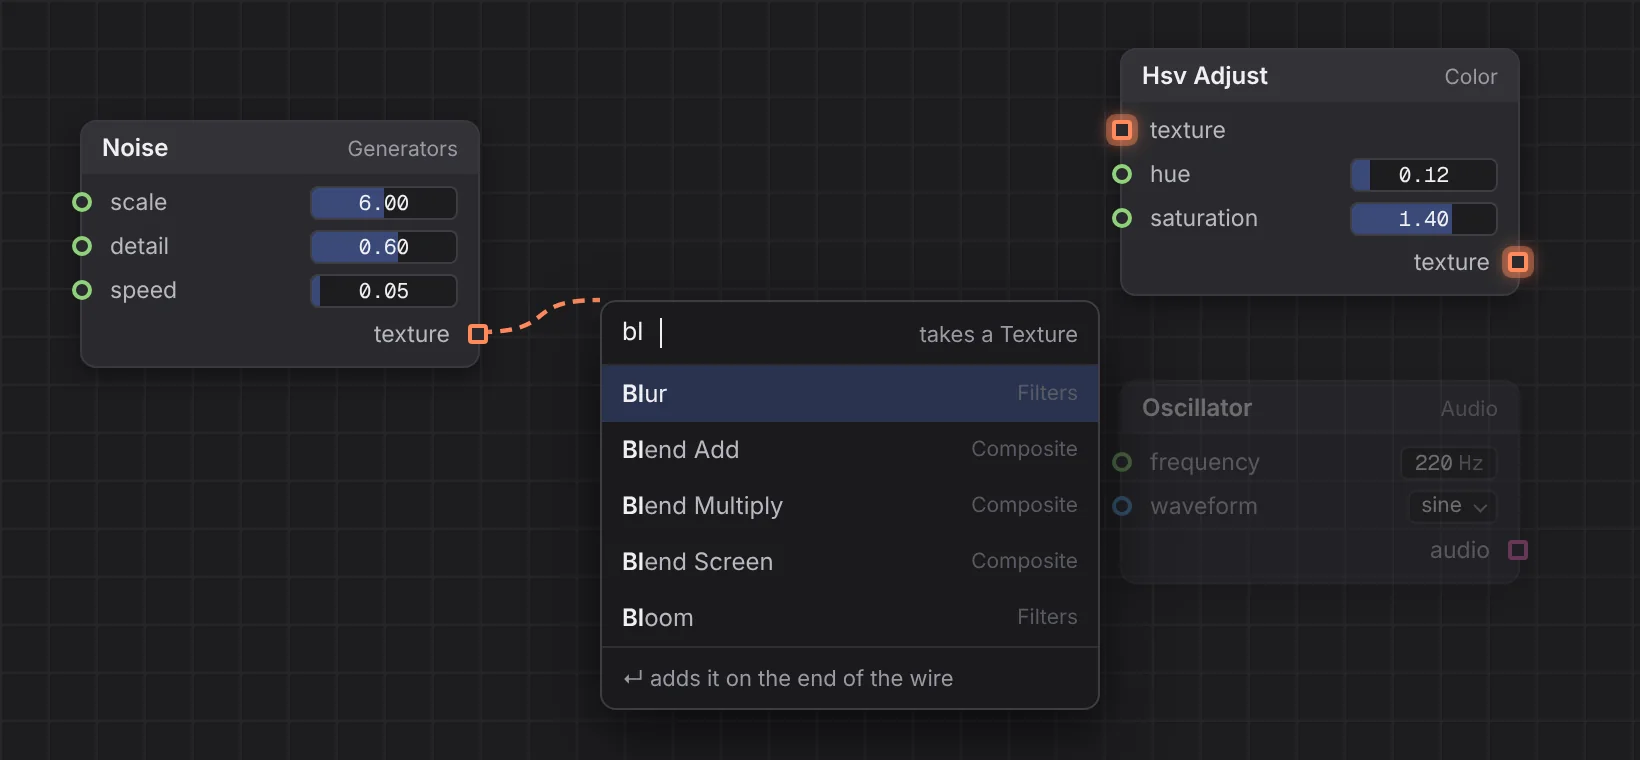
Every input has its control.
An input with no wire shows its control right on the node: a slider for a number, a swatch for a colour, a menu for a choice. Wire something in and the control steps aside. Properties and Perform show the same control, so you can set it wherever you're looking.
A pin's colour tells you its type and its shape tells you how it moves: a dot holds a value, a square carries a stream, an arrow fires a trigger. Drag a wire and only the inputs that can take it light up.
Open any effect and change it.
Nothing in Tato is sealed. Open an effect, edit how it works in the editor inside Studio, and save. The picture updates and keeps playing.
If you break it, the log says what failed and why. You don't have to use our editor, either. An effect is a file, and it opens in whatever you like.
Write your first effect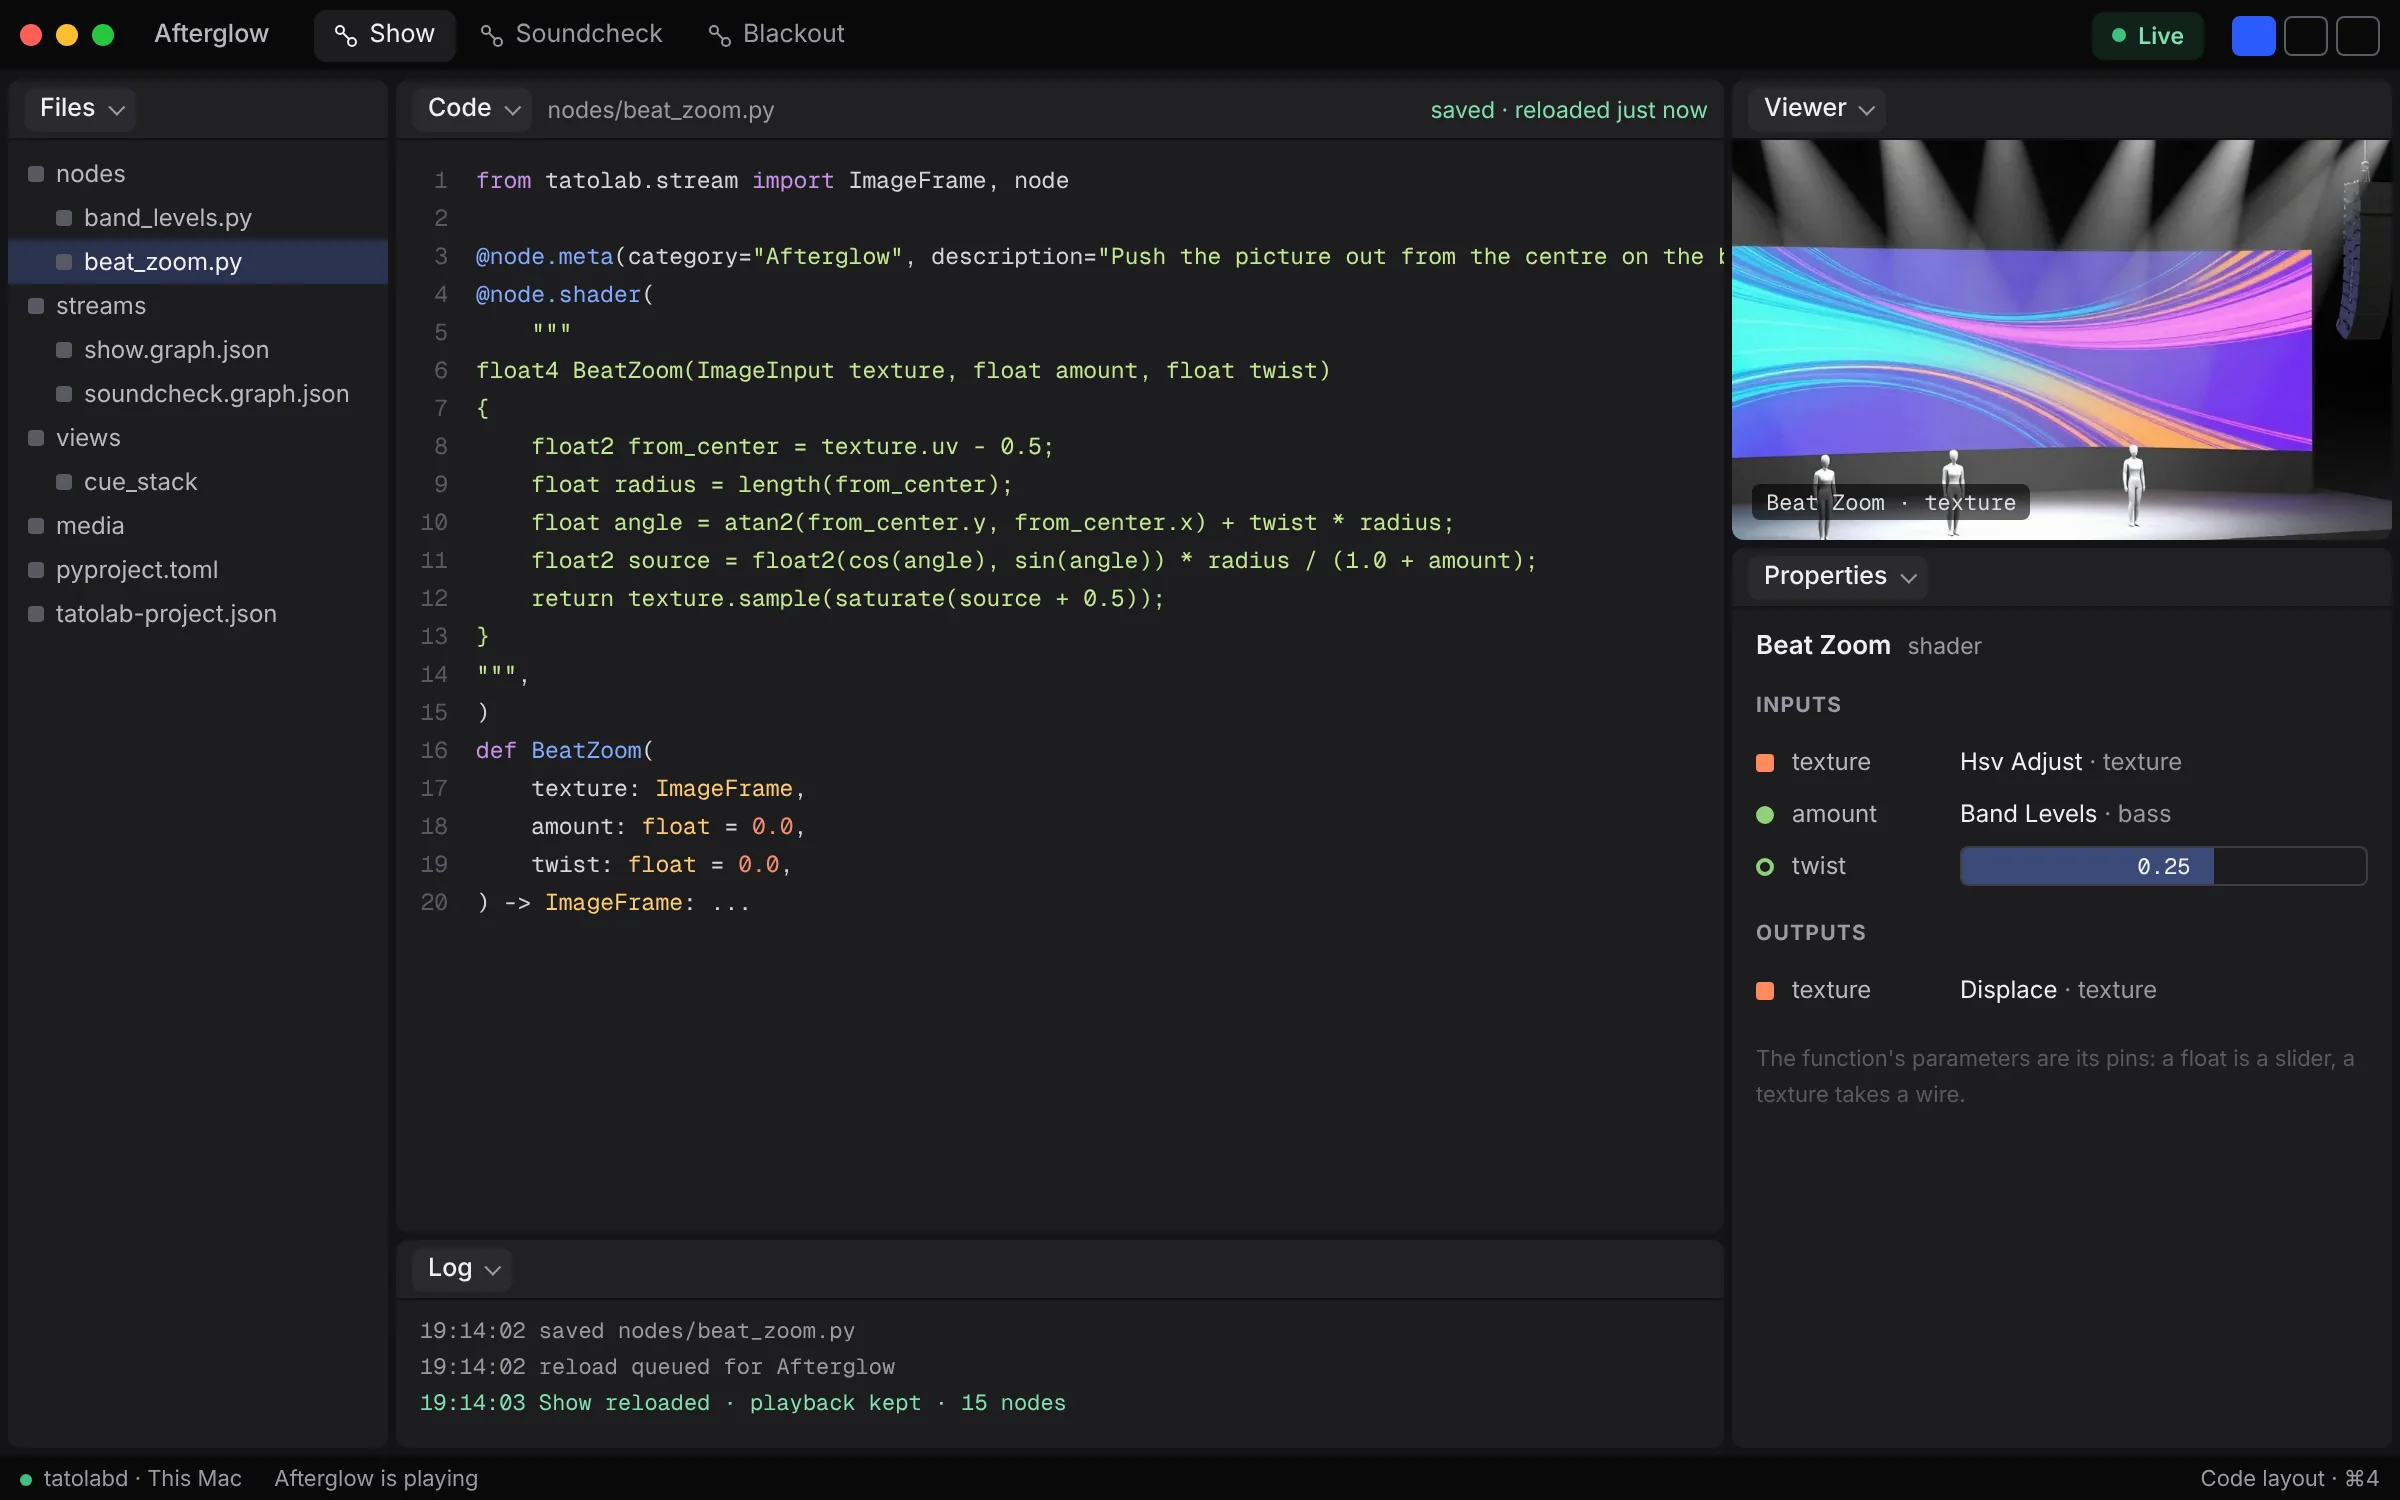
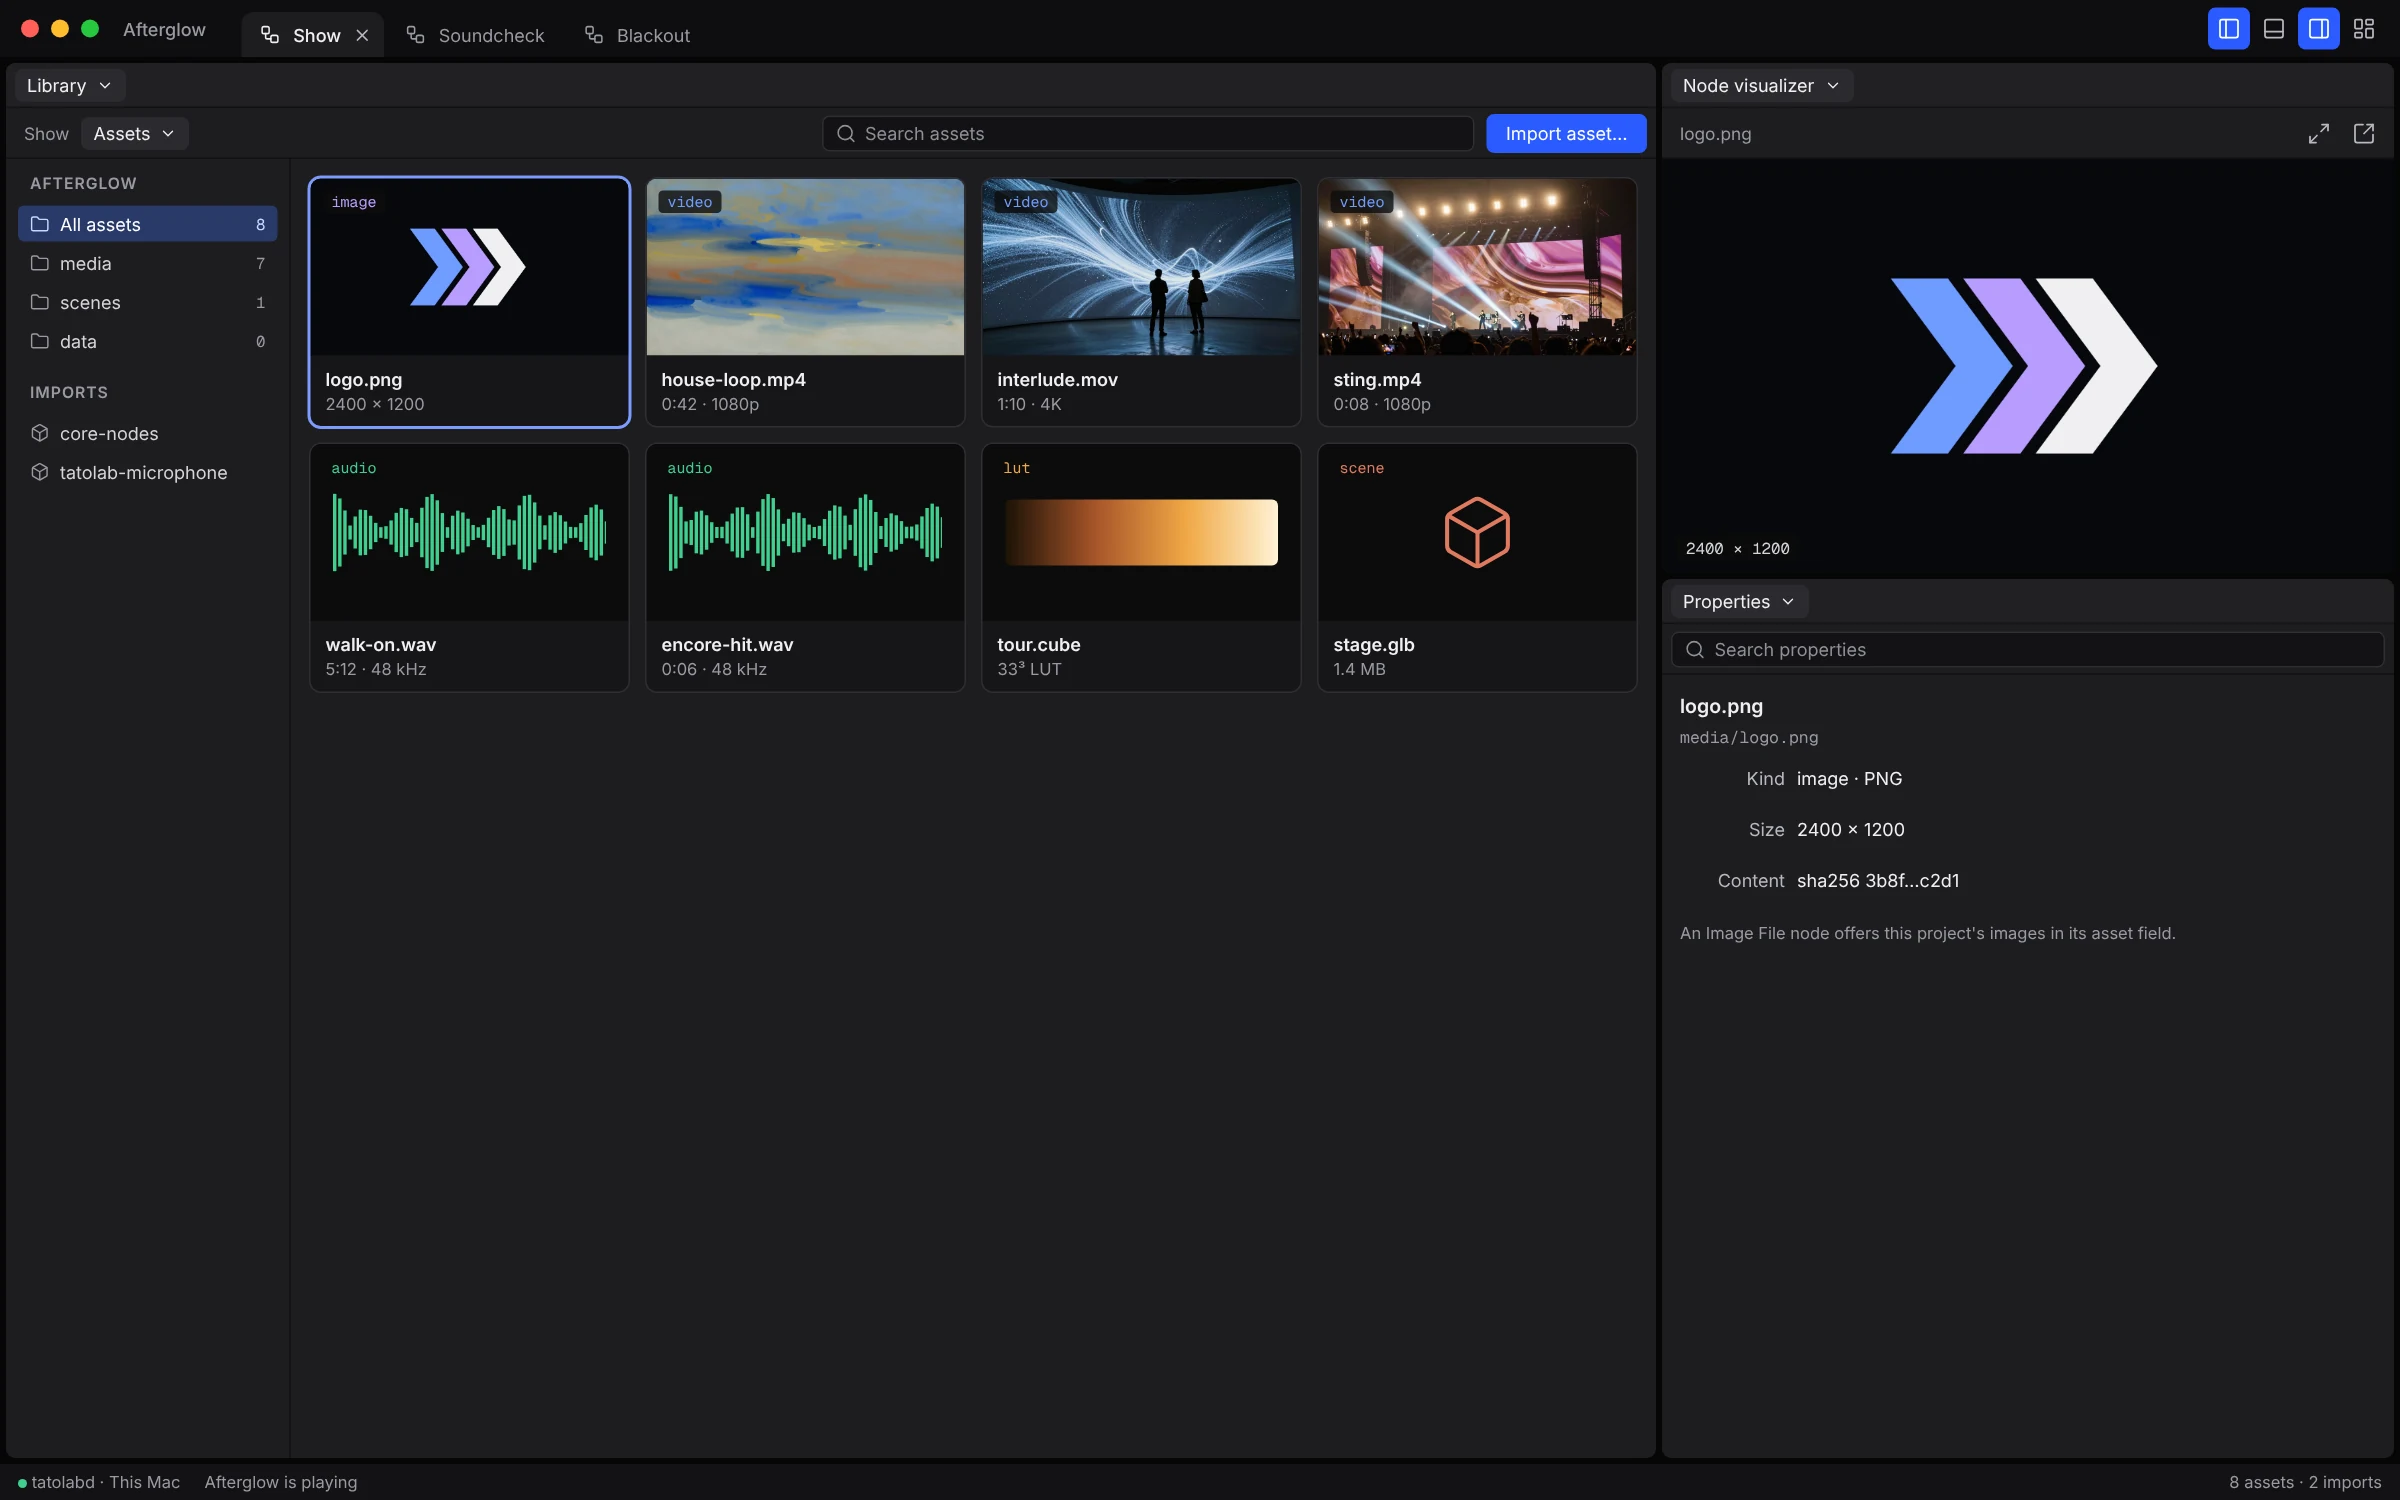
Your media travels with the project.
Import a logo, a texture or a 3D scene and it's copied into the project folder. Hand the folder to someone else and everything comes along. The Library shows what's in there.
Images work today. Nothing plays a video or audio file yet. For now those sit in the Library and wait.
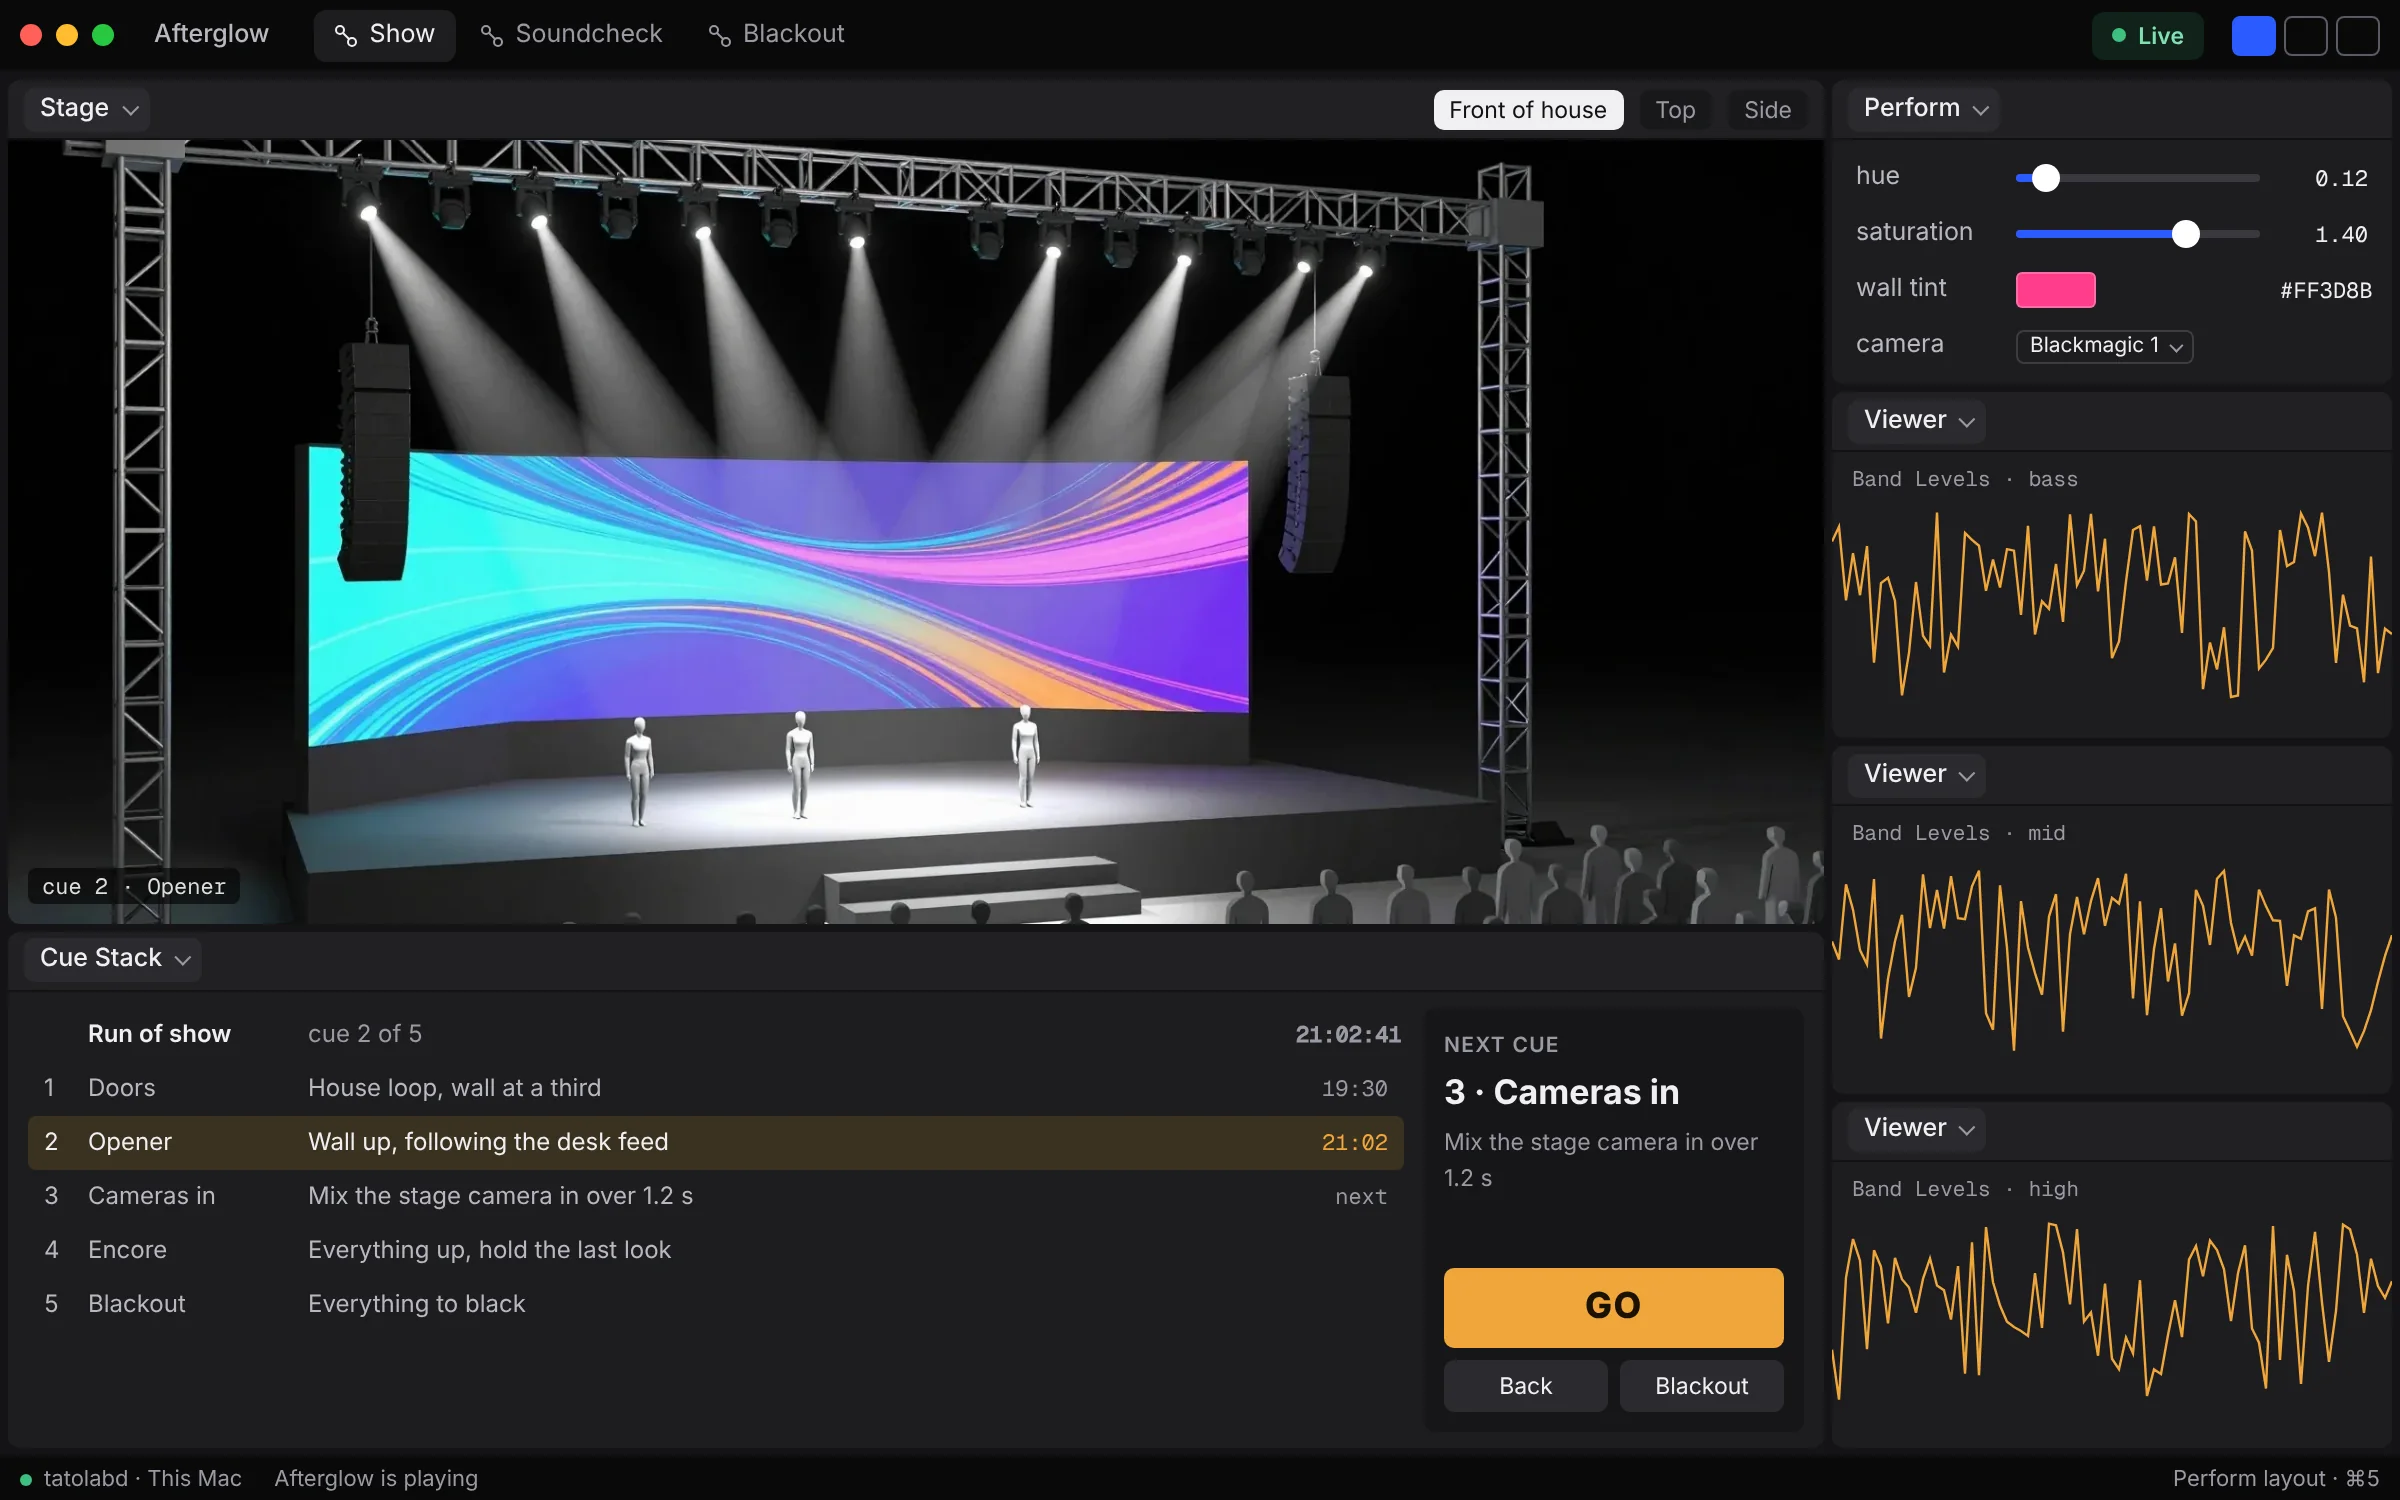
Run the show.
Nobody wants to look at a graph during the show. Save a layout with only the picture, your controls and a panel you designed. Switch layouts with one key, and pop the picture out into its own window for the second screen.
Build it with an AI agent.
Point Claude Code or any other agent at your project. It can see the graph and look at the picture, then add and connect things while everything keeps playing.
History shows who did what: you, the agent, the command line or the runtime. Undo only takes back your own edits, and the agent's undo only takes back its own.
claude mcp add tatolab -- tatolab mcp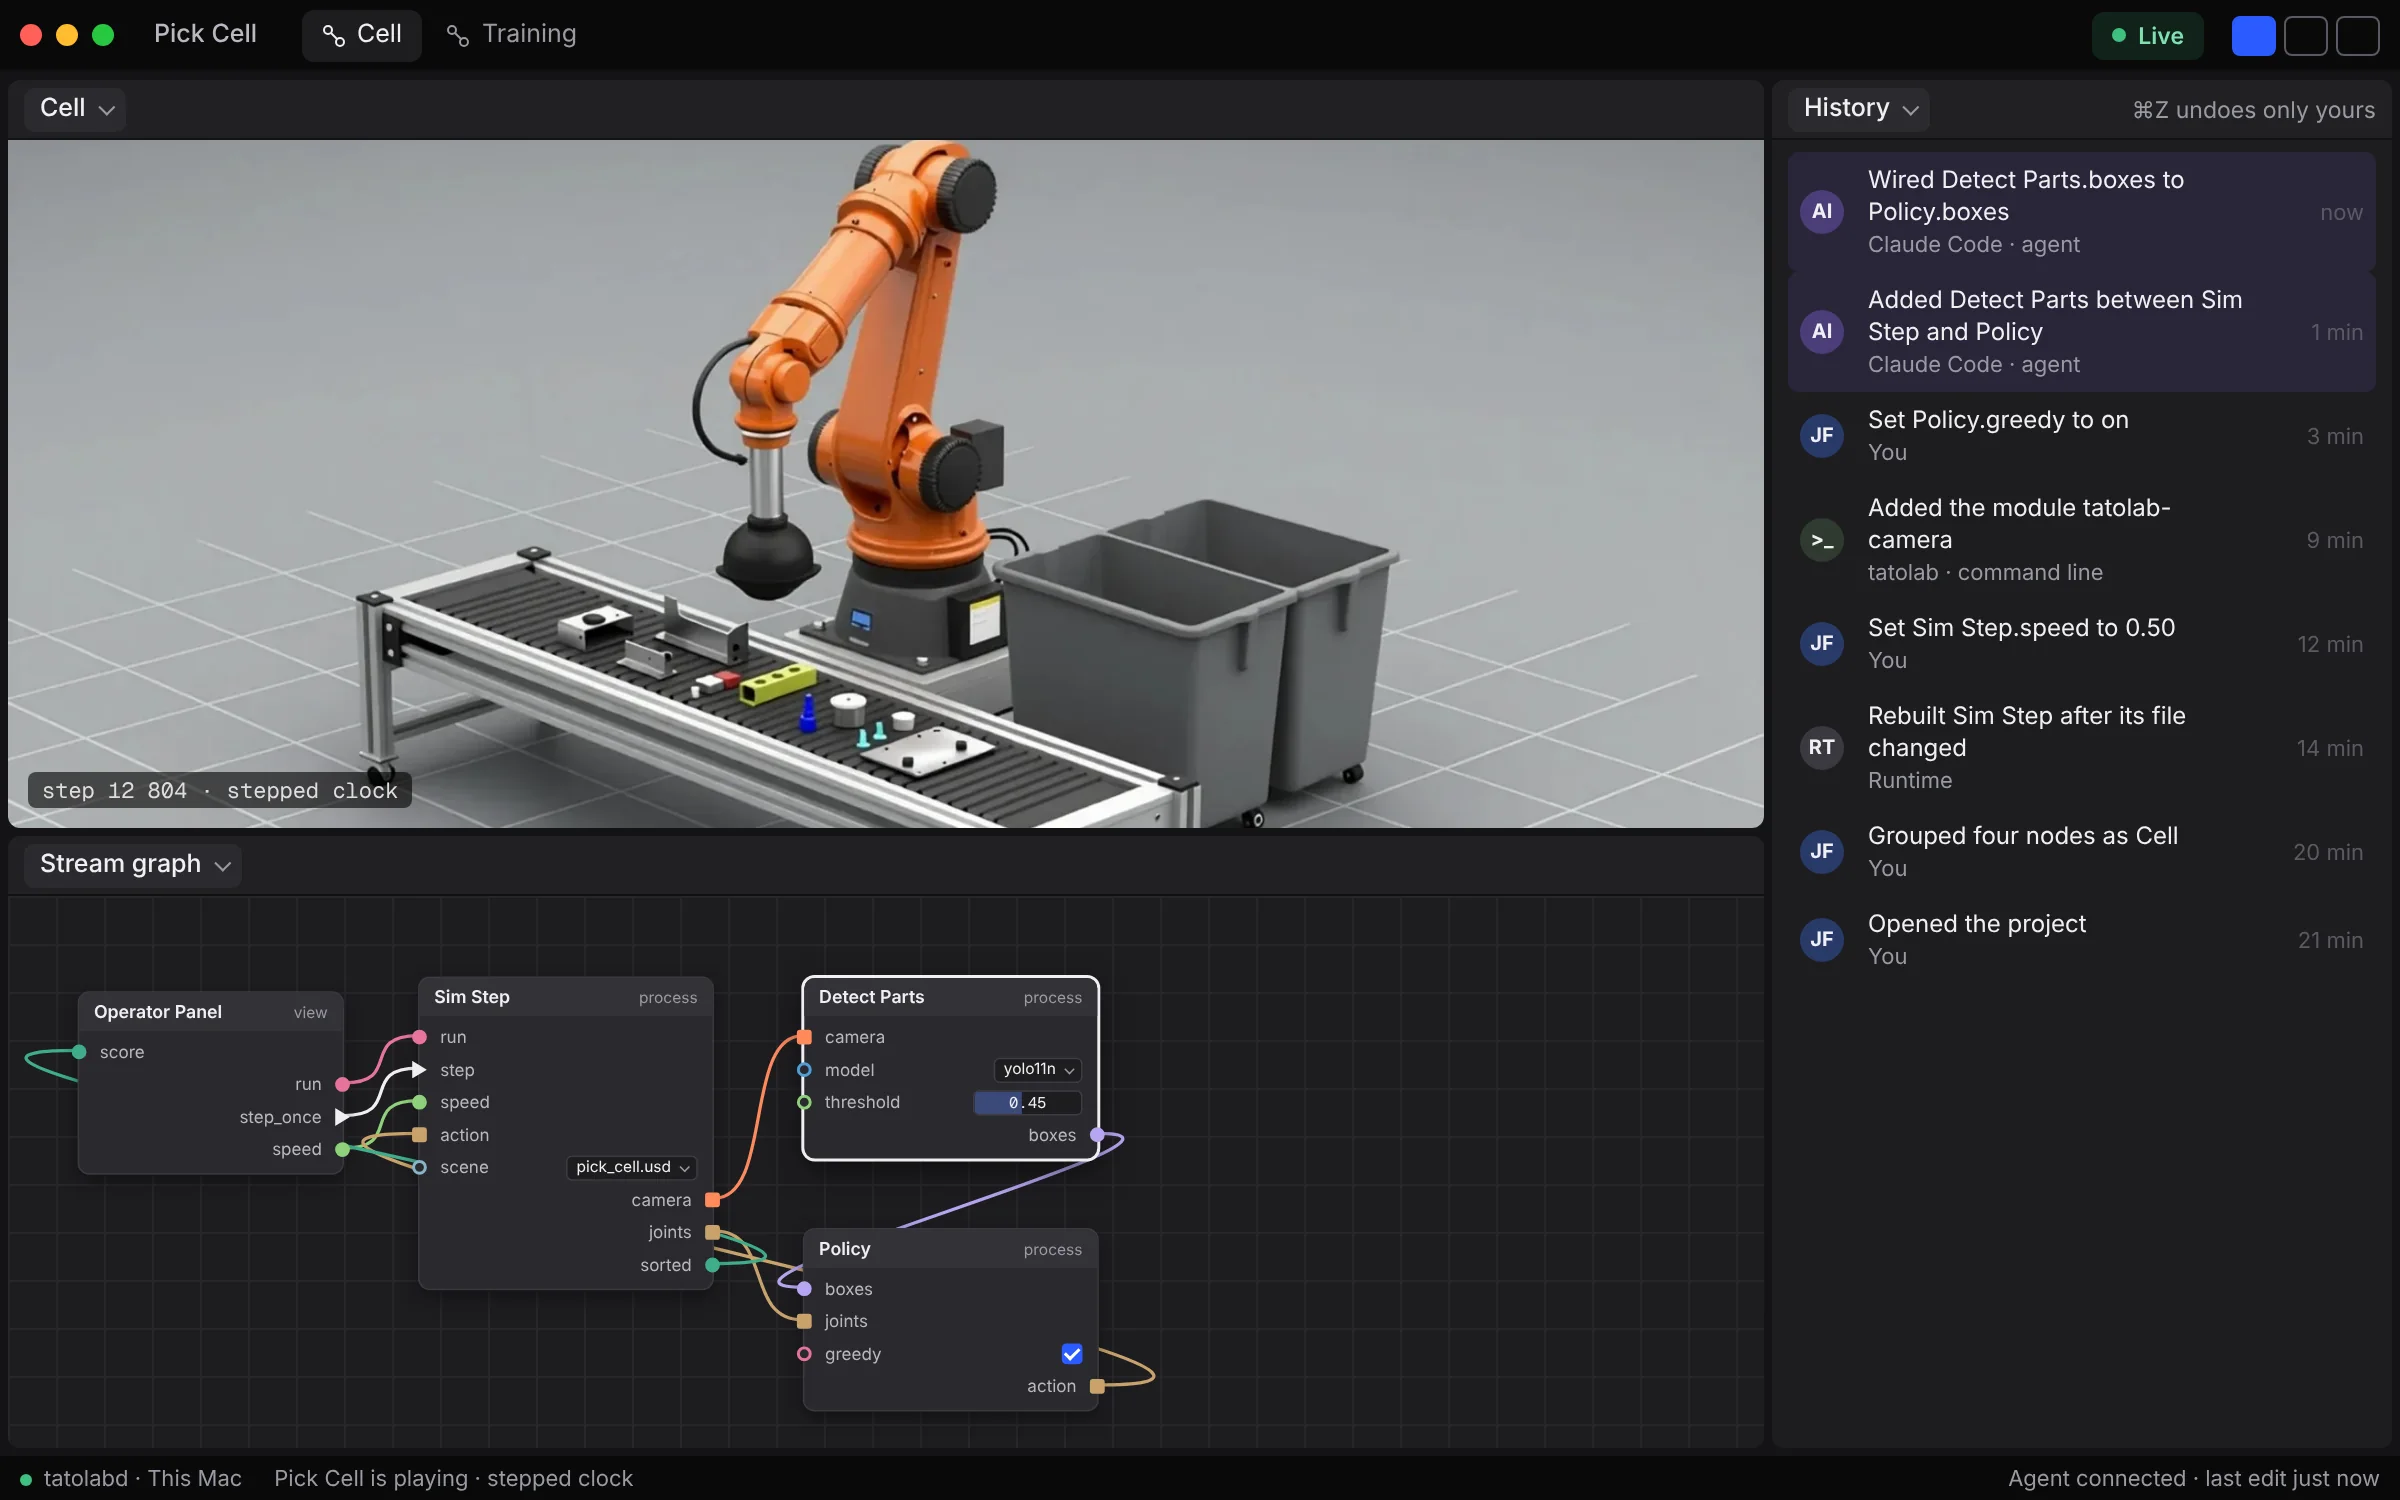
Run it on your machine.
Tato Studio is free and open source. You won't be asked to sign in, and there's no licence key to lose.
orbrew install --cask tatolab/tap/tato-studio
The engine is GPL-3.0-only. Tato Studio is AGPL-3.0-only, or a commercial licence from Tatolab LLC. Read the licences